

TL;DR:
- DIY dry ice candy creates a crunchy, puffed texture by sublimating CO2 to remove moisture from candies with moderate moisture content. Proper safety precautions are essential, including working outdoors, using gloves, and avoiding airtight seals to prevent CO2 buildup. While it produces a fun, dense crunch, professional freeze-dried candy offers longer shelf life and a much lighter, melt-in-your-mouth experience.
Dry ice candy has taken social media by storm, and it’s easy to see why. The idea of turning ordinary Skittles into something puffed, crunchy, and almost unrecognizable is genuinely fascinating. But between the viral videos and the DIY enthusiasm, a lot of confusion has crept in about what this process actually does to candy, what it’s really called, and whether it’s safe to try at home. This guide cuts through the noise. You’ll learn the real science behind the crunch, a step-by-step method that works, and the safety rules you absolutely cannot skip.
Table of Contents
- Key Takeaways
- What dry ice candy actually is (and the science behind it)
- How to make dry ice candy at home
- Picking the right candy for the best results
- Dry ice myths and safety facts worth knowing
- DIY dry ice candy vs. commercial freeze-dried treats
- My honest take on the dry ice candy trend
- Try the real thing with Space-man
- FAQ
Key Takeaways
| Point | Details |
|---|---|
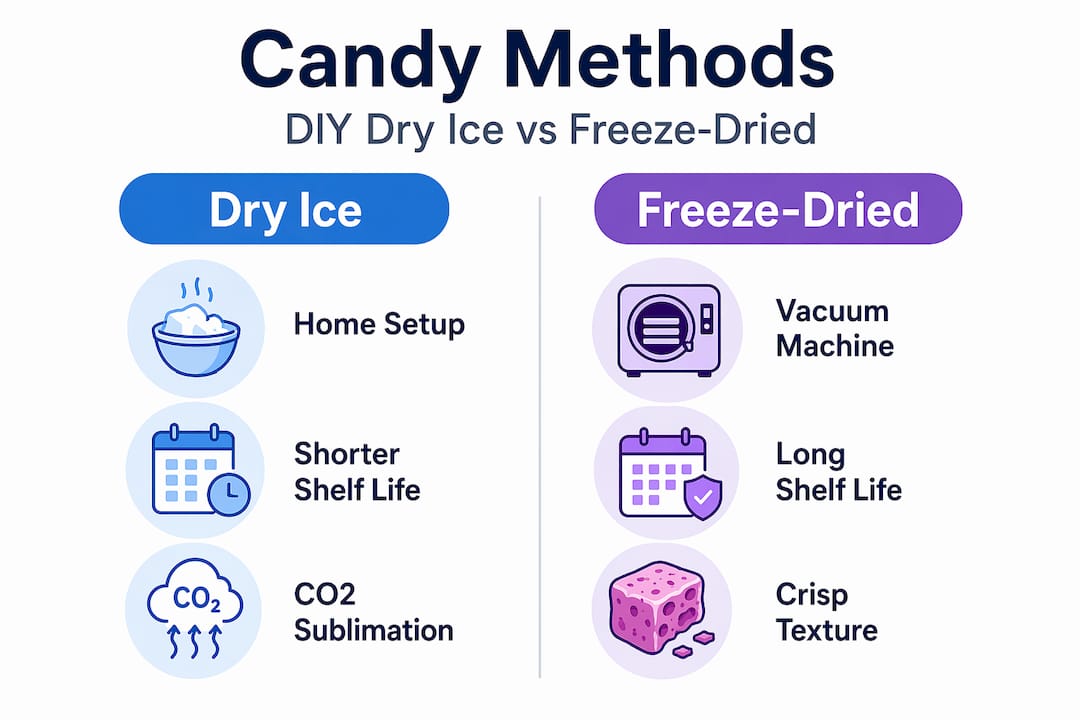
| Dry ice candy vs. freeze-drying | DIY dry ice candy mimics vacuum-puffing but doesn’t replicate professional freeze-drying; results and shelf life differ. |
| Safety is non-negotiable | Never handle dry ice bare-handed and never seal it in an airtight container. CO2 buildup can cause explosive pressure. |
| Candy selection matters | Candies with moderate moisture content puff best; very dry candies like Tic Tacs won’t change much at all. |
| Store it right | After processing, keep your candy in airtight containers to maintain crunch for weeks. |
| DIY has limits | Home dry ice methods are fun experiments, not substitutes for commercial freeze-drying equipment. |
What dry ice candy actually is (and the science behind it)
The phrase “dry ice candy” gets thrown around loosely online, which causes a lot of confusion. Let’s set the record straight. What most people call dry ice candy is more accurately described as vacuum-puffed candy when made commercially. At home, the dry ice method is an attempt to replicate that effect using sublimating CO2 gas to draw moisture from candy and create a light, airy, crunchy texture.
Vacuum-puffing removes moisture using special ovens that create a vacuum environment, which causes water molecules inside the candy to expand and escape rapidly. A University of Wisconsin food science professor explains that most candies contain nearly zero freezable water, so the transformation is about structural changes, not simply freezing. The result is candy that expands, hardens, and delivers an intensely concentrated flavor.
The DIY version with dry ice approximates this by creating a cold, CO2-rich environment inside a loosely sealed container. As the dry ice sublimates and gas escapes, it creates pressure dynamics that pull some moisture from the candy over roughly 24 hours. It’s not the same as a professional vacuum oven. But it does produce a noticeably crunchier, lighter candy that many people find genuinely addictive.
| Method | Equipment | Texture result | Flavor change | Shelf life |
|---|---|---|---|---|
| DIY dry ice | Cooler, dry ice, bag | Crunchier, puffed | Slightly more intense | Days to weeks |
| Commercial vacuum-puffing | Industrial vacuum ovens | Very light, airy, expanded | Highly concentrated | Months |
| Dehydration | Food dehydrator | Chewy to firm | Mildly concentrated | Weeks |
Understanding this difference matters before you start. You’re not going to replicate Space-man quality freeze-dried candy with a styrofoam cooler. But you can create something genuinely fun, crunchy, and snackable at home. To go deeper on how freeze-drying works versus the dry ice method, that breakdown is worth reading before you start experimenting.
Pro Tip: If you want to understand whether what you’re making is truly freeze-dried or vacuum-puffed, feel the candy after processing. True freeze-dried candy is extremely light and dissolves quickly on the tongue. DIY dry ice candy tends to be denser and crunchier without the same melt-in-mouth quality.
How to make dry ice candy at home
What you’ll need
Before you start, gather everything so you’re not scrambling mid-process with frozen hands.
- About 5 lbs of dry ice (food grade)
- 2 cups of candy (Skittles, gummy bears, or similar)
- A styrofoam cooler
- A resealable freezer bag
- Thick insulated gloves or tongs
- A loose-fitting lid for the cooler
Step-by-step method
The viral DIY procedure follows a straightforward sequence that most people get right on the first try, as long as they respect the safety rules.
- Lay your candy in a single layer inside the open freezer bag. Don’t pile them up since even coverage helps with consistent results.
- Place the bag inside the styrofoam cooler. Leave the bag open or only lightly folded at the top.
- Layer dry ice around and over the bag using tongs or thick gloves. Never use bare hands.
- Place the cooler lid on top. Do not seal it airtight. This is critical.
- Leave the setup undisturbed for approximately 24 hours in a well-ventilated area.
- After 24 hours, check the candy. Let any remaining dry ice fully sublimate before you reach inside.
- Once all the dry ice is gone, remove the candy and store it in an airtight container immediately.
Pro Tip: Work outdoors or in a garage with the door open. CO2 gas is odorless and can accumulate indoors without you noticing. Good airflow is your best protection.
Safety rules you cannot ignore
Dry ice burns skin on contact. The thermal injury risk from even a few seconds of direct skin contact is the same as touching a hot pan. Use insulated gloves or tongs every single time you handle it, without exception.

The container situation is equally serious. Dry ice sublimates into CO2 gas at a volume expansion of 760:1. Trap that in a sealed container and you’re building a pressure bomb. A loosely placed lid, not snapped or locked, gives gas somewhere to escape. That’s what keeps the process safe.
Picking the right candy for the best results
Not every candy transforms the same way under dry ice conditions, and choosing the wrong one is the fastest route to a disappointing result.
The key variable is moisture content. Candy that contains moderate moisture (think gummies, chewy candies, Skittles) tends to puff and harden in satisfying ways. Hard candies with very low moisture, like Tic Tacs, won’t puff at all. They either stay the same or become uncomfortably hard. Milk chocolate is tricky since it can develop a powdery bloom and unpleasant texture from temperature and humidity exposure.
Candies that work well:
- Skittles (classic choice for a reason)
- Gummy bears and gummy worms
- Peach rings and similar gummy-coated candies
- Taffy and chewy caramels
- Starburst pieces
Candies that often disappoint:
- Tic Tacs and similar hard mints
- Plain hard candies with no filling
- Milk chocolate bars (white and dark chocolate can handle it better)
- Very thick gummies that don’t dry through evenly
Timing affects texture too. Under-drying leaves candy soft or slightly tacky, while over-drying can make gummies collapse into brittle fragments. Your first batch will probably take some trial and error. Start with Skittles since they’re forgiving, inexpensive, and reliably satisfying when they work.
For storage, candy maintains its crunch for weeks when sealed in airtight containers immediately after processing. Exposure to humidity is the enemy. Silica gel packets inside the storage container are a smart addition if you live somewhere humid.
Dry ice myths and safety facts worth knowing
A lot of people approach dry ice candy with one of two misconceptions. Either they treat dry ice like regular ice from the freezer (way too casual) or they think it’s so dangerous that any home use is reckless (way too cautious). Reality sits between those extremes.
“Dry ice can cause severe burns and frostbite if improperly handled. Use insulated gloves or tongs, ensure proper ventilation, and never store dry ice in airtight containers.” — Lawrence Berkeley National Laboratory Environmental Health and Safety
The CO2 buildup danger is real but completely manageable with vented containers and outdoor or well-ventilated spaces. People mistakenly think “loosely closed” means they can snap a lid on and crack it slightly. That’s not enough. The lid should rest on top with no locking mechanism engaged.
Another common myth is that the process is “just freezing” the candy. It’s not. The dry ice environment creates sublimation-driven moisture removal, which is a fundamentally different physical process than freezing. That’s why you get a texture change, not just a cold candy that returns to normal as it warms up.
DIY dry ice candy vs. commercial freeze-dried treats
Knowing where DIY dry ice candy fits relative to other methods helps you set realistic expectations and make smarter choices.
Professional freeze-drying, the kind used by companies like Space-man, uses specialized vacuum freezing equipment that first freezes candy at extremely low temperatures, then removes moisture through sublimation under a controlled vacuum. The process takes significantly longer than 24 hours and produces candy that is dramatically lighter, shelf stable for months, and far more structurally transformed than what dry ice achieves at home.
The differences between freeze-drying and dehydrating are also worth understanding. Dehydration uses heat, which can degrade flavor. Freeze-drying and vacuum-puffing preserve flavor compounds more completely because no heat is applied. That’s why professionally processed freeze-dried candy tastes so intensely like the original, just amplified and crunchy.
The freeze-dried candy market is projected to grow from $1.3 billion in 2024 to $3.1 billion by 2034, driven heavily by social media exposure among consumers under 45. The DIY dry ice trend is part of that same wave of curiosity. Home experiments are a great way to understand what the process does. But for consistent results, shelf-stable quality, and actual flavor intensity, commercial products win without question.
My honest take on the dry ice candy trend
I’ve watched the dry ice candy trend explode, and I’ll be straight with you: the first time I tried it myself, I underestimated the importance of ventilation. I was in a small kitchen with the window barely cracked. About 20 minutes in, I had a mild headache. Moved outside. Lesson learned fast.
The process itself is genuinely fun. There’s something almost magical about opening a cooler the next morning and finding your Skittles looking like tiny space rocks. The crunch is real. The flavor pop is real. And for a party candy idea or a kitchen experiment, it delivers.
What I’d push back on is the idea that this equals freeze-dried candy. It doesn’t. The texture is crunchier but denser. The shelf life is shorter. And the consistency batch to batch depends on your dry ice quantity, your cooler, your ambient humidity, and how well you sealed things. Some batches come out perfect. Others are chewy disasters.
The trend isn’t going anywhere. The social media-driven curiosity around frozen and cooling candy experiences keeps feeding new waves of DIY experiments. My advice: try it once for the experience, respect the safety rules completely, and then let the professionals handle the production if you actually want great candy.
— Chadi
Try the real thing with Space-man
If the dry ice experiment has you hooked on the concept of puffed, crunchy, intensely flavored candy, Space-man makes the professional version that DIY methods are trying to imitate. Based in Canada, Space-man produces freeze-dried candy using real vacuum processing equipment, not a cooler and a bag of dry ice.

The 10-pack candy bundle is a great starting point for anyone who wants to experience what fully vacuum-processed freeze-dried candy actually tastes and feels like compared to the homemade version. For those interested in larger quantities, the 40-bag variety pack covers wholesale and enthusiast needs with a solid range of flavors. Space-man also offers private label and co-packing services for anyone looking to bring their own freeze-dried candy product to market. Whether you want to taste the difference or build a business around it, the candy is ready.
FAQ
What is dry ice candy?
Dry ice candy refers to candy processed in a dry ice environment to create a crunchier, puffed texture through CO2-driven moisture removal. It mimics commercial vacuum-puffing but produces results that differ in texture density and shelf stability.
Is it safe to make dry ice candy at home?
Yes, with proper precautions. Always use insulated gloves or tongs, work in a well-ventilated area, and never seal the container airtight. CO2 pressure buildup in a sealed container is a genuine explosion risk.
What candies work best for dry ice puffing?
Candies with moderate moisture content like Skittles, gummies, and chewy taffy produce the best results. Very dry candies like hard mints won’t puff and may simply harden further.
How long does dry ice candy stay crunchy?
When stored in an airtight container immediately after the dry ice fully sublimates, the candy can stay crunchy for several weeks. Humidity exposure will rehydrate and soften it quickly.
How is dry ice candy different from commercial freeze-dried candy?
Commercial freeze-dried candy uses industrial vacuum ovens to produce a dramatically lighter, more shelf-stable product with intensified flavor. DIY dry ice candy is denser and shorter lived, closer to a fun experiment than a true freeze-dried product.