

TL;DR:
- Effective fixture placement in candy stores guides customer flow, increases visibility, and promotes impulse buying.
- Retailers should select fixtures based on product type, space, and customer behavior, using planograms for consistency.
- Data-driven testing and regular refreshes optimize sales and prevent display fatigue, turning fixtures into silent salespeople.
Walk into any top-performing candy store in Canada and you will notice something beyond colorful packaging and tempting aromas. The fixtures themselves are doing serious work. Where products sit, how they are displayed, and what containers hold them all shape whether a customer grabs one bag or five. Most retailers treat fixtures as background furniture, but the ones growing their sales fastest treat them as active selling tools.
Table of Contents
- Understand the role of fixtures in candy retail
- Types of popular candy store fixtures and display solutions
- How to optimize store layout and fixture placement
- Planograms: Setting operational standards for candy merchandising
- Common pitfalls and advanced tips for fixture success
- Why most candy fixture advice misses the real game-changers
- Take your candy store display to the next level
- Frequently asked questions
Key Takeaways
| Point | Details |
|---|---|
| Fixtures are strategic tools | Choosing and placing candy fixtures shapes customer behavior and drives purchases. |
| Clear displays increase sales | See-through canisters and gondola fixtures boost product identification and controls servings. |
| Planograms boost consistency | Operational standards for shelf setup lead to better merchandising and less guesswork. |
| Store layout matters | Careful fixture placement and lighting enhance findability, flow, and overall experience. |
| Test and refresh often | Refreshing displays and tracking results keep candy sales growing year-round. |
Understand the role of fixtures in candy retail
Fixtures are not decoration. They are the architecture of your sales floor, and every design decision either moves product or slows it down. When a customer walks into your store, their eyes and feet follow a path that your fixtures either guide or block. Poor fixture planning creates confusion and missed sales. Thoughtful fixture placement creates a smooth, satisfying experience that ends at the cash register.
Behavior-driven merchandising consistently outperforms aesthetics-only approaches because it focuses on what customers actually do rather than what looks appealing in a design sketch. A fixture that reduces “search time,” which is the amount of effort a shopper puts into finding what they want, converts casual browsers into buyers. When candy is easy to find and visually separated by category, customers spend more time exploring and less time feeling frustrated.
Here is what well-chosen fixtures accomplish for candy retailers specifically:
- Visibility control: Place high-margin products at eye level and watch sales climb without any extra marketing spend.
- Search time reduction: Clear, organized displays help customers find what they want faster, reducing decision fatigue.
- Hotspot promotion: Strategic fixture placement drives traffic to premium or new products.
- Repeat attention: Rotating your display layout gives returning customers something fresh to discover.
“A well-placed fixture is not just furniture. It is a silent salesperson working every hour your store is open.”
Learning to build effective candy store displays means thinking about customer behavior before you think about aesthetics. What is the first thing customers see? Where do they naturally slow down? Which zones get the most foot traffic? Answer those questions, then put your fixtures where the answers point.
Types of popular candy store fixtures and display solutions
Not every fixture works for every store, and understanding your options lets you make smarter investments. The most common fixture types in Canadian candy retail fall into a few clear categories, each with distinct strengths.
Gondola shelving is the backbone of most candy retail environments. Double-sided gondola units let you maximize floor space while organizing candy by brand, flavor, or type. They work particularly well for packaged goods and bagged candies. The standard gondola is adjustable, which means you can adapt shelf heights as your product mix changes.
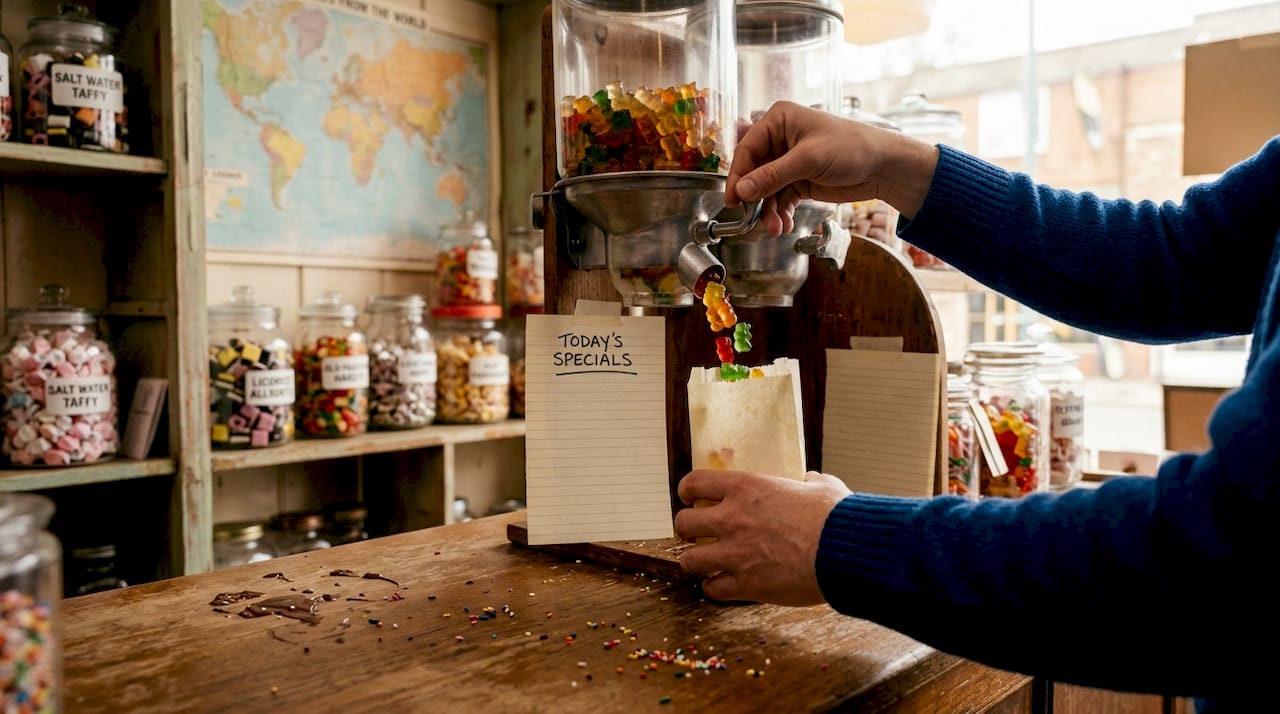
Canister and bulk dispensers change the shopping experience entirely. Clear canister dispensers improve product identification and provide controlled dispensing, which supports hygiene standards and portion management. Shoppers can see exactly what they are getting, and the tactile, scoop-it-yourself format drives impulse purchases by turning candy selection into an experience.
Freestanding racks and spinner displays are low-cost, flexible options for smaller stores or pop-up environments. They can be moved easily, which makes them ideal for seasonal promotions or testing new product placements before committing to a permanent fixture setup.
Here is a side-by-side comparison to help you decide what fits your store:
| Fixture type | Best for | Space requirement | Cost range | Ideal for |
|---|---|---|---|---|
| Gondola shelving | Packaged, bagged candy | Medium to large | Moderate to high | Permanent, organized displays |
| Canister dispenser | Bulk and loose candy | Small to medium | Moderate | Interactive, impulse zones |
| Freestanding rack | Seasonal, new products | Small | Low | Flexible, moveable setups |
| Wall-mounted displays | Specialty or premium items | Minimal floor space | Low to moderate | Featured or branded products |
| Counter display units | Checkout impulse buys | Minimal | Low | Last-minute add-on purchases |
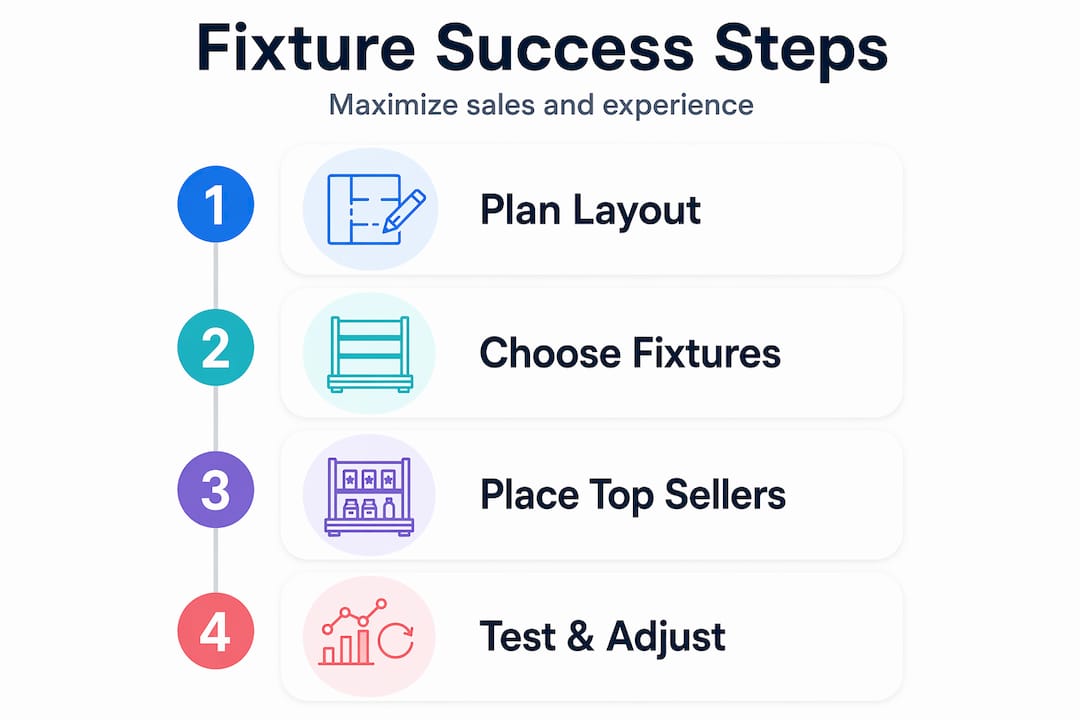
Follow this numbered checklist when selecting fixtures for your candy store:
- Define your product mix first. Loose bulk candy needs dispensers. Packaged bags need shelving or racks.
- Measure your floor space accurately, including traffic flow corridors of at least 36 inches between units.
- Identify your highest-margin products and plan fixtures that place them at peak visibility zones.
- Consider your customer base. Kids-focused stores benefit from lower fixture heights and colorful, accessible containers.
- Budget for flexibility. Invest in fixtures that can be reconfigured as your product range grows.
Stores that use a mix of gondola shelving for their core product lines alongside canister dispensers for bulk items typically see the strongest sales per square foot. Exploring innovative candy display ideas can help you match the right fixture to the right product category. And if you are unsure where to start visually, studying eye-catching candy displays that have proven track records gives you a practical benchmark.
Pro Tip: Impulse purchases spike when candy is placed near the entrance or checkout counter. Position your most visually striking product, whether that is vibrant freeze-dried candy or oversized gummy displays, at these high-traffic intersections.
How to optimize store layout and fixture placement
You can have the best fixtures in the world and still underperform if you put them in the wrong places. Store layout is where fixture strategy meets traffic psychology, and the rules are straightforward once you know them.
Good store design prioritizes easy findability, correct gondola shelf height, uncluttered displays, and well-lit merchandise across every category. These are not suggestions. They are the baseline for competitive candy retail.
Here is a practical placement framework:
| Zone | Fixture recommendation | Product strategy |
|---|---|---|
| Store entrance | Low-profile freestanding racks | New arrivals, seasonal specials |
| Main aisle | 54-60 inch gondola shelving | Core product lines, bestsellers |
| End caps | Feature displays or spinner racks | Promotions, featured brands |
| Checkout counter | Counter display units | Impulse add-ons, small packs |
| Back wall | Wall-mounted or tall gondolas | Bulk items, staple categories |
Keep negative space in mind. Many candy stores make the mistake of filling every inch of available display space because more product seems like more opportunity. The opposite is often true. Crowded fixtures create visual noise that overwhelms shoppers and buries your best products. Leaving deliberate gaps around hero products signals their importance and makes them easier to grab.
Lighting is a simple upgrade with outsized returns. A small spotlight above a new arrival or a seasonal display draws eyes without any verbal cue. LED strip lighting under gondola shelves creates a premium feel and helps products at lower heights stay visible. Freeze-dried candy with its bright, vivid colors responds especially well to direct lighting.
Pro Tip: Walk your own store as a customer. Start at the entrance, move naturally through the space, and notice where your eyes land and where they do not. Those blind spots are where you are losing sales. Move a fixture or add a light source and test the difference over two weeks.
Reviewing candy display strategies tailored to retail environments and applying practical maximize sales tips will sharpen your placement decisions considerably.
Planograms: Setting operational standards for candy merchandising
A planogram is a visual diagram that maps exactly where each product should sit on your fixtures. Think of it as a blueprint for your shelves. Rather than making daily guessing decisions about where to put things, you follow a documented plan that has been tested for sales performance.
Planograms specify exactly where each candy item goes and how it is presented on fixtures, driving consistency and measurable sales growth. Large retailers have used them for decades. Smaller candy stores that adopt planogram thinking gain the same advantage without needing a dedicated retail team to maintain it.
Here is what a planogram does for your operation:
- Removes guesswork: Every team member knows exactly where products go. No more improvised restocking decisions.
- Standardizes facings: A “facing” is the number of product units facing the customer. More facings increase visibility. A planogram tells you exactly how many facings each product deserves based on sales data.
- Supports training: New staff can follow a planogram diagram immediately. This cuts onboarding time and maintains display consistency across shifts.
- Enables testing: When you change a planogram and sales shift, you know exactly what you changed. That makes it much easier to figure out what works for your specific customer base.
Implementing your first planogram does not require expensive software. Start with a simple grid sketch of your gondola shelves, label each position with a product name and facing count, and take a photo of the completed display. That photo becomes your visual standard. Refer to it when restocking and adjust it every quarter based on what is actually selling.
Pro Tip: Use your point-of-sale data to identify your top 10 bestselling candy items. Give those items the most prominent facings on your planogram. Eye-level positioning and extra facings combined can increase unit sales by a significant margin without a single dollar spent on marketing.
Learning proven candy display strategies gives you a ready-made framework to build your first planogram around. Pairing that with strong candy packaging best practices ensures your products look as good on the shelf as they do in your planogram plan.
Common pitfalls and advanced tips for fixture success
Even experienced candy retailers fall into the same traps. Knowing what not to do is just as valuable as knowing what to do.
The copy-and-paste mistake: Generic fixture advice assumes a one-size-fits-all shopper. Your store has a specific flow, customer demographic, and product mix. Display psychology guidance sometimes emphasizes aesthetics over measurable, candy-specific outcomes. Adapt every tip to what your sales data actually shows, not what looks good in a trade magazine.
Static displays: Leaving the same display layout for months kills impulse buying for repeat customers. They stop seeing it because familiarity breeds invisibility. Refresh at least one feature display every month. Seasonal themes, new product introductions, or even a simple color-block reorganization can reactivate customer attention.
Material mismatches: Wire racks look great for some candy categories and cheap for others. Acrylic or clear containers elevate the perceived value of premium products like artisan chocolates or freeze-dried candy varieties. Think about whether your fixture material is adding to or subtracting from the product’s perceived worth.
Here are advanced fixture tactics worth testing:
- Cross-merchandise strategically: Place freeze-dried candy near beverages or snack items. Pairing complementary products together increases basket size without requiring additional shelf space.
- Use height variation intentionally: Mixing tall canister dispensers with low counter trays creates visual rhythm that holds attention longer than a flat, uniform display.
- Track and measure: Mark your fixture positions on a store map, then correlate them with monthly sales data by zone. After 90 days, you will have concrete evidence about which fixture placements produce results for your specific store.
- Rotate your fixtures periodically: Even moving a gondola unit a few feet can make a longtime customer feel like they are discovering something new.
Digging into detailed guidance on freeze-dried candy merchandising is especially useful if you carry or plan to carry freeze-dried varieties, which have unique visual appeal and respond exceptionally well to transparent display containers and spotlight lighting.
Why most candy fixture advice misses the real game-changers
Here is an opinion that might push back against most of what you read online: the candy retail fixture industry spends too much time talking about how displays look and almost no time talking about whether they convert. Beautiful displays do not pay rent. Sell-through rates do.
Most guides focus on color coordination, themed decor, and seasonal styling. Those things matter at the margin. But the real game-changer is collecting even basic data about what customers do in your store. Which zones do they stop in? Which fixtures do they skip entirely? Which products do they pick up and put back down? These questions have answers, and they are far more valuable than any styling tip.
The retailers who outperform their competitors year after year are not the ones with the most Instagram-worthy stores. They are the ones who treat their floor plan like a hypothesis, test it against sales data, and adjust. They implement maximizing candy display results through iteration, not instinct alone.
Our honest take: start simple, measure everything you can, and let your own shoppers teach you what works. A modest gondola with a well-executed planogram and monthly refreshes will outperform a visually stunning display that never gets evaluated. Empirical benchmarks beat gut feelings every single time in retail.
Take your candy store display to the next level
Ready to translate what you have learned into real results on your sales floor? At Space-Man, we work directly with Canadian candy retailers to provide the products and display solutions that make this strategy practical from day one.
Our retail display rack kit is designed specifically for candy retailers who want a complete, ready-to-deploy fixture and product solution. For stores just getting started with freeze-dried candy, our candy starter pack gives you 40 bags of wholesale variety product that fits seamlessly into any existing display setup. And if you want to go further with your own branding on shelf, our private label and co-packing services put your store’s identity on every package. Canadian-made, retailer-focused, and built to move product.
Frequently asked questions
What is the best height for candy gondola shelves?
Optimal gondola shelf heights are 54 to 60 inches, which balances strong product visibility with sufficient inventory capacity for most candy store environments.
How do clear canister dispensers help in a candy store?
Clear canister dispensers let customers immediately identify candy types and allow for controlled, hygienic dispensing that supports both portion management and a better customer experience.
What is a planogram and why is it important in candy retail?
A planogram is a visual layout that specifies merchandise placement on each fixture, improving category consistency and giving retailers a repeatable, data-informed framework for driving sales growth.
How often should I change up my candy store displays?
Refresh your displays at least monthly or seasonally to keep repeat customers engaged and trigger fresh impulse purchases. Small changes like color blocking, rotating featured products, or adding a new fixture type are enough to reset customer attention effectively.