

TL;DR:
- Choosing the right freeze dryer involves matching machine capacity, electrical requirements, and vacuum pump type to your weekly batch volume and environment.
- Proper preparation, confirmation of complete dryness through weighing, and immediate packaging are essential for safe and successful long-term preservation.
Choosing the right freeze dryer means matching your food preservation goals, batch volume, and operating environment to a machine that can realistically deliver on all three. Lyophilization, the technical term for freeze drying, removes moisture through sublimation rather than heat, which is why freeze dried foods retain far more nutrition and texture than dehydrated alternatives. Brands like Harvest Right dominate the North American consumer market, but picking the right model size, vacuum pump type, and electrical setup matters just as much as the brand itself. This guide covers every factor you need to make a confident, informed purchase in 2026.
How to choose a freeze dryer: size and capacity first
The single most important decision in any freeze dryer buying guide is matching machine capacity to your actual batch volume. Buying too small means running the machine constantly. Buying too large means paying for power and space you never use.
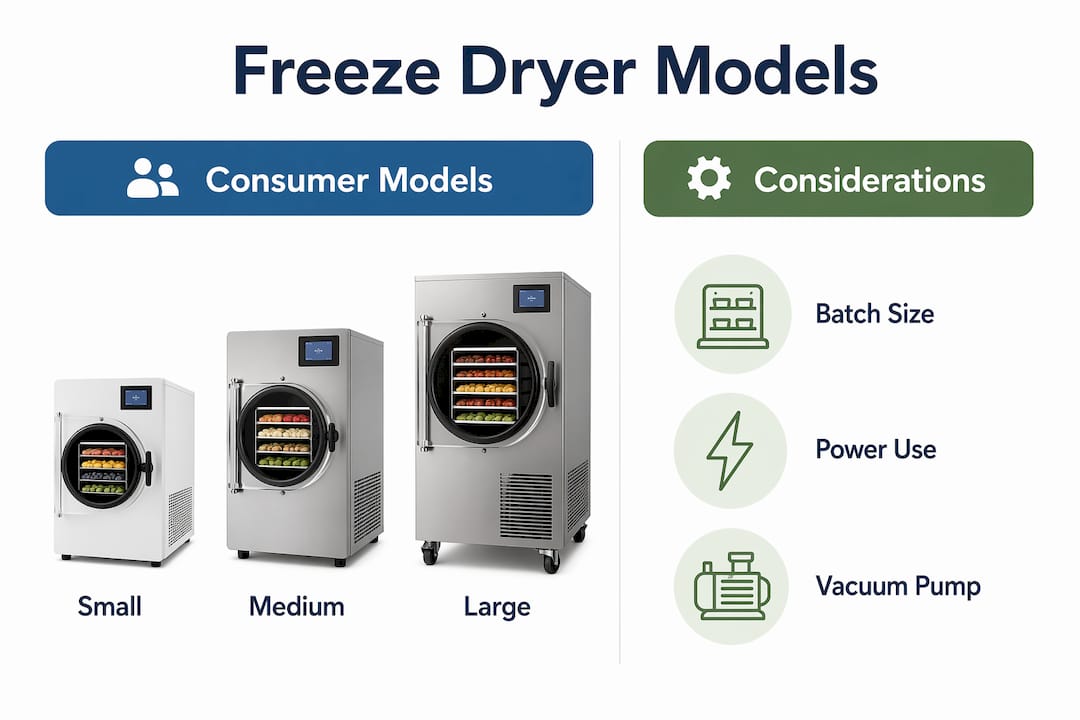
Harvest Right offers four consumer tiers: Small, Medium, Large, and XL. The Small model handles 6 to 9 lb per batch at $3,295 CAD, while the Medium processes 10 to 15 lb per batch at $4,195 CAD. That price gap reflects real differences in tray count, chamber volume, and compressor capacity. For a household preserving seasonal produce or building an emergency food supply, the Medium is the most popular entry point.
Here is a quick reference for the Harvest Right consumer lineup:
| Model | Batch capacity | Trays | Typical use case |
|---|---|---|---|
| Small | 6–9 lb | 4 | Solo users, trial batches |
| Medium | 10–15 lb | 5 | Families, hobbyists |
| Large | 16–27 lb | 6 | Serious hobbyists, small business |
| XL | 40–50 lb | 9 | Small commercial operations |
Electrical requirements scale with size, and this is where many buyers get surprised. Medium units run on a standard 110V outlet, but XL units may require a dedicated 20A circuit and potentially an electrician visit before you can even plug in. If you are renting or working in a shared kitchen space in Canada, confirm your electrical panel before you order.
Key sizing factors to confirm before purchasing:
- Batch frequency: How many cycles per week do you realistically plan to run?
- Floor space: Harvest Right Medium units measure roughly 18" x 21" x 29". Add clearance for ventilation.
- Dealer support: Canadian buyers benefit from authorized dealers who can assist with warranty claims without cross-border shipping headaches.
- Warranty coverage: Harvest Right offers a one-year parts and labor warranty. Confirm what your dealer covers locally.
What operational factors actually affect your running costs?
Most freeze dryer reviews focus on purchase price and ignore the cost of actually running the machine. That is a mistake. Cycle times for medium home freeze dryers typically range 24 to 36 hours, and food type pushes that range in both directions. High-sugar foods like candy take longer. Lean proteins like chicken breast dry faster.
Electricity costs for medium units average around $237 per year in Canada based on typical usage. That figure assumes moderate use. If you are running four cycles per month on a Medium unit, you are looking at roughly 112 runtime hours monthly, which affects both your electricity bill and how you schedule your week.
Vacuum pump choice is the other major operational variable. Oil-sealed pumps require regular oil changes but cost less upfront. Oil-free pumps cost more initially but need less maintenance and run noticeably quieter. For home users with the machine in a kitchen or utility room, the noise difference is real and worth paying for.
Practical operational considerations:
- Oil changes: Oil-sealed pumps need fresh oil every 20 to 25 cycles. Budget time and cost for this.
- Noise level: Oil-free pumps are significantly quieter, which matters if the machine runs overnight.
- Cycle scheduling: Running cycles overnight saves you from babysitting the machine during the day.
- Pre-freezing: Placing food in a standard freezer before loading the freeze dryer shortens cycle time and improves texture uniformity.
Pro Tip: Pre-freezing your food for at least two hours before loading the trays shortens freeze drying cycles and produces more consistent results. It is one of the easiest wins available to beginners.
How to prepare foods and confirm complete dryness
Food safety in freeze drying depends entirely on two things: proper preparation and confirmed complete dryness. Freeze drying preserves food by lowering water activity to prevent bacterial growth, but it does not kill bacteria. Utah State University extension research makes this clear. If food goes in contaminated or comes out incompletely dried, it is not safe regardless of how long it sat in the machine.
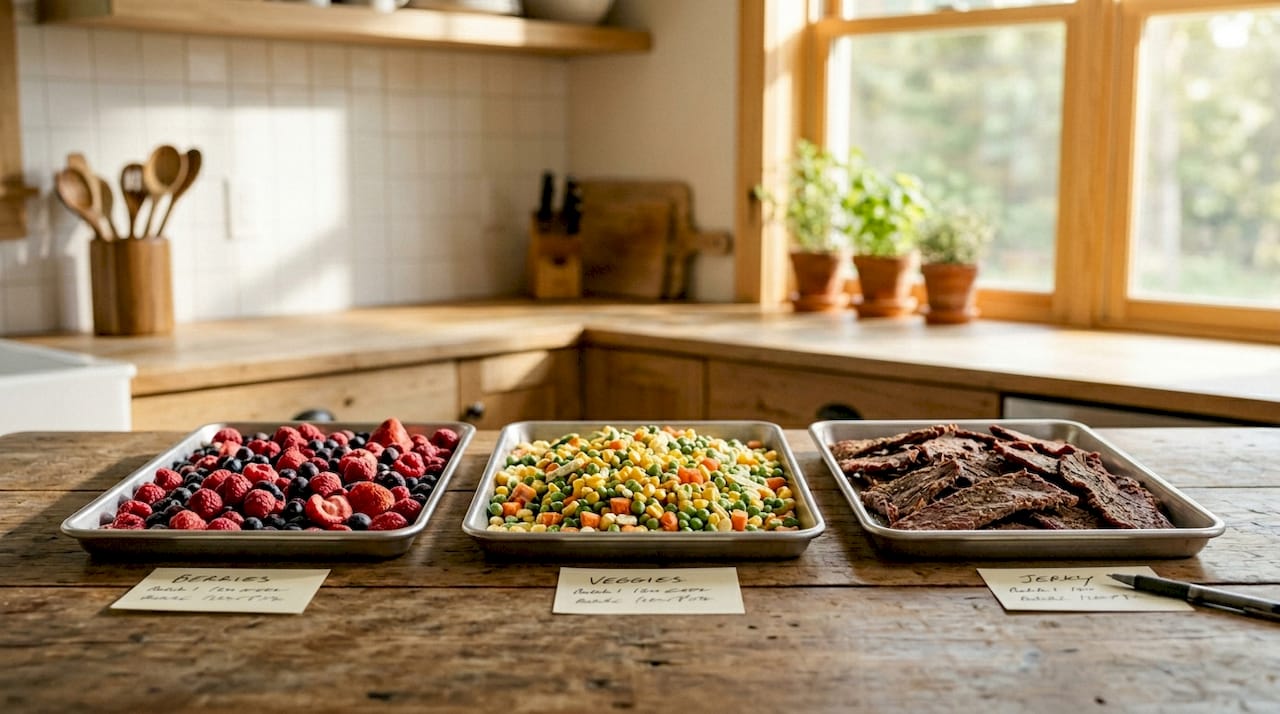
Foods that work well include fruits, vegetables, cooked meats, dairy, eggs, and even full meals. Raw animal products need proper handling before drying. For a detailed walkthrough on freeze drying meat safely, preparation steps matter as much as the machine settings.
Foods to avoid or handle with extra care:
- High-fat foods: Butter and oils do not freeze dry well and can go rancid quickly.
- High-sugar syrups: Honey and jam can remain sticky and resist complete drying.
- Raw eggs in shell: Always crack and beat eggs before freeze drying.
- Alcohol-heavy foods: High alcohol content interferes with the sublimation process.
Once the cycle completes, do not assume the food is done. Confirming complete dryness by weighing trays before and after additional drying is the most reliable method. If the weight stays constant between checks, drying is complete. Other methods include mTorr vacuum readings on the machine display and infrared thermometer checks on individual pieces.
Steps to verify dryness before packaging:
- Weigh the tray immediately after the cycle ends.
- Run an additional 2-hour dry cycle.
- Weigh again. If weight is unchanged, the batch is complete.
- Check a few pieces manually. They should snap, not bend.
- Package immediately in Mylar bags with oxygen absorbers and seal within minutes.
Pro Tip: Package freeze dried food immediately after confirming dryness. Leaving trays exposed to air for even 30 minutes allows moisture reabsorption, which shortens shelf life significantly. Have your packaging and storage setup ready before the cycle ends.
Common mistakes when selecting and using a freeze dryer
The most expensive freeze dryer mistake is buying based on price and footprint alone. A machine that fits your budget and your counter but cannot handle your batch frequency will frustrate you within the first month.
Many beginner mistakes come from ignoring workflow factors like immediate packaging after cycles and insufficient dryness confirmation. Experienced users treat the freeze dryer as one station in a larger workflow, not a standalone appliance. The machine finishes a cycle, and the packaging station needs to be ready and waiting.
Common pitfalls to avoid:
- Ignoring electrical requirements: Confirm your outlet and circuit before ordering, especially for Large or XL models.
- Underestimating cycle time: A 30-hour cycle means you cannot start a new batch until the next day. Plan your weekly schedule around this.
- Skipping dryness checks: Packaging food that still contains moisture leads to spoilage and wasted batches.
- Cutting food unevenly: Inconsistent piece sizes mean some pieces finish drying while others do not. Uniform cuts matter.
- No packaging station ready: Leaving freeze dried food exposed to air while you search for Mylar bags defeats the purpose of the process.
- Overlooking noise and location: A loud oil-pump machine in a small apartment is a real quality-of-life issue. Factor this in.
Freeze dryer features comparison: which model fits your situation?
Selecting the right freeze dryer comes down to matching features to your specific situation rather than chasing the highest-spec machine available. Here is a side-by-side look at the key variables that separate consumer models:
| Feature | Small | Medium | Large/XL |
|---|---|---|---|
| Batch size | 6–9 lb | 10–15 lb | 16–50 lb |
| Power requirement | 110V standard | 110V standard | 110V or 220V |
| Pump options | Oil or oil-free | Oil or oil-free | Oil or oil-free |
| Best for | Solo users, testing | Families, hobbyists | Small business, high volume |
| Estimated annual electricity | Under $150 | ~$237 CAD | $300+ CAD |
Harvest Right is the dominant consumer brand in North America, and for good reason. Their machines are well-supported, parts are available, and the user community is large enough that troubleshooting help is easy to find. That said, the right model depends on your throughput goals, not brand loyalty.
For small business users considering scaling up, the jump from a Large home unit to a commercial freeze dryer is significant in both cost and complexity. A better path for many is to start with a Large Harvest Right, validate your product and volume, then explore co-packing arrangements before committing to commercial equipment. This approach keeps capital risk low while you build your customer base.
If you want a deeper look at how freeze dryers compare to other preservation methods, the freeze dryer vs. dehydrator comparison at Space-man covers the key differences in nutrition retention, texture, and shelf life.
Key takeaways
Choosing the right freeze dryer requires matching machine capacity, electrical setup, and vacuum pump type to your actual batch volume and operating environment before any other consideration.
| Point | Details |
|---|---|
| Size before price | Match batch capacity to your weekly volume before comparing price tags. |
| Electrical check first | Confirm your outlet and circuit can handle the model you want, especially for Large or XL units. |
| Pump type matters | Oil-free pumps cost more upfront but save maintenance time and reduce noise significantly. |
| Dryness confirmation is non-negotiable | Weigh trays before and after additional drying to confirm complete moisture removal. |
| Workflow over machine specs | Have your packaging station ready before the cycle ends to prevent moisture reabsorption. |
What I have learned from watching people buy freeze dryers
Chadi here. After years of working in the freeze dried food space with Space-man, the pattern I see most often is this: people research the machine obsessively and completely ignore everything that happens after the cycle ends. They compare tray counts and pump specs for weeks, then open the chamber and leave the food sitting on the counter while they look for bags.
The machine is only as good as the workflow around it. I have seen batches from well-configured Harvest Right Large units fail because the operator skipped the weight check and packaged food that still had residual moisture. I have also seen Small units produce consistently excellent results because the operator was disciplined about pre-freezing, uniform cuts, and immediate packaging.
My honest recommendation for beginners: start with a Medium unit, buy the oil-free pump upgrade, and spend as much time setting up your packaging station as you spend setting up the machine. For Canadian buyers specifically, buy from an authorized dealer. Cross-border warranty claims are a headache nobody needs.
One more thing. Freeze drying does not sterilize food. This is not a technicality. It is a safety fact that food safety depends on drying completeness and packaging, not just the process itself. Treat it seriously from batch one.
— Chadi
Ready to take your freeze dried products further?
If you are moving beyond home batches and thinking about selling freeze dried products under your own brand, Space-man offers private label and co-packing services designed specifically for small Canadian businesses. You bring the product concept. Space-man handles the processing, packaging, and labeling at scale, so you can focus on building your brand without investing in commercial equipment before you are ready.

Whether you are freeze drying candy, snacks, or specialty foods, the co-packing route lets you test the market with professional-grade packaging and consistent quality. It is a practical next step for anyone who has outgrown their home unit but is not ready to commit to a commercial freeze dryer purchase.
FAQ
What size freeze dryer should a beginner buy?
Most beginners do well with a Medium Harvest Right, which handles 10 to 15 lb per batch and runs on a standard 110V outlet. It balances capacity, cost, and electrical simplicity for household or small-scale use.
How long does a freeze drying cycle take?
Cycle times for medium home freeze dryers typically range 24 to 36 hours depending on food type and batch size. High-sugar or high-moisture foods push toward the longer end of that range.
Does freeze drying kill bacteria?
Freeze drying does not kill bacteria. It lowers water activity to prevent bacterial growth, but food safety depends entirely on complete drying and proper handling before and after the cycle.
What is the difference between oil and oil-free vacuum pumps?
Oil-sealed pumps cost less upfront but require regular oil changes every 20 to 25 cycles. Oil-free pumps cost more initially, need less maintenance, and run quieter, making them better suited for home environments.
How do I know when freeze dried food is fully dry?
Weigh the trays after the cycle ends, run an additional 2-hour dry cycle, then weigh again. If the weight has not changed, drying is complete. Pieces should snap cleanly rather than bend when tested by hand.